Gonnateachyahow: Backing Up Your DVD Collection For Free - Disc to Digital Part 1

Grab a Movie from Your Collection
Converting YOUR Movies
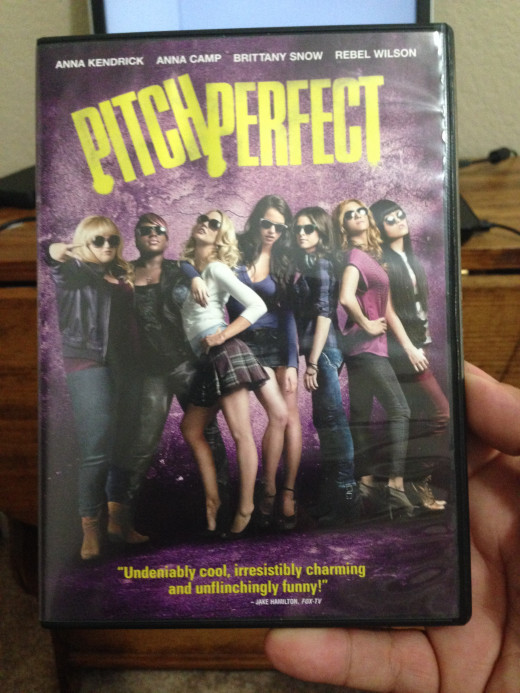
First off let me request that this walk though not be used for making illegal copies of movies, this is an aid for you to make copies of your DVD movies for backup copy, or use with various devices including Video Game Systems, Tablets, Phones, TV etc. It is meant to help people who want access anywhere to their media, not for media pirates. Please only back up what you physically or digitally own. In this case I own Pitch Perfect which came with an Ultraviolet Code, but want to be able to watch it on my Apple Devices, my Playstation 3, and my tablets without using data.
DVD Shrink
DVD Shrink is one of the first and best DVD copiers, it is also free. It can be found online by doing a simple search. It is meant to shrink down double layer DVD's and make them burnable on a single layer disk. This is not how we will be using it today (although you can use it like that by not changing the compression setting below).
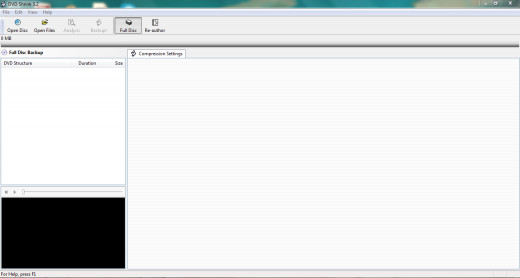
After you have found and installed this free program on your computer you are welcome to continue.
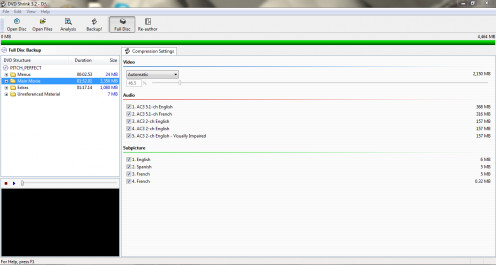
After installing the program on your computer open it up. You will see the main screen that looks like this.
Insert Your Movie
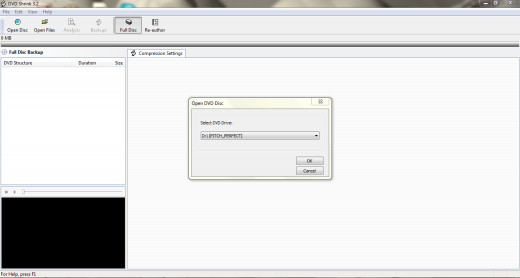
Place the movie in the drive, after your computer has located it you can begin the process.
Click the "Open Disc" tab on the far left. It will then ask you for the drive your disk is in. You can change the disk name if it doesn't default to the drive by clicking on the drop down menu. Please then click "OK".
Analyzing the Movie
Here is where you will come into problems, if you are going to encounter them at all. If the movie stops analyzing it will error out. Some copy proctiections will not let DVD Shrink read them. You can get past this with another software application called AnyDVD. Most movies read fine though. This set is usually pretty fast, taking two minutes or less in most cases.

Choosing Your Compression
After the Disk has been anazlyed it will give you a new screen, I would suggest leaving most of this alone, it will not be something you will need to worry about, but clicking and turning off one could have major problems for your final product, including no sound.
At the top there is a compression ratio that you can set. If you are backing up your discs to let kids watch the back up copies you will need to leave this alone also.
The compression is set for Automatic and will compress she video file down to make it fit on a single layer disk. If you are making a digital copy change this to "No Compression", this will leave the original movie quality unaffected as it converts to the hard drive. Keep in mind that this could take up to 9 GB of hard drive space, so make sure you have it open.
The top green line will probably turn partially red, this is normal and not an issue, this just states the file is too big for a standard blank DVD disc.

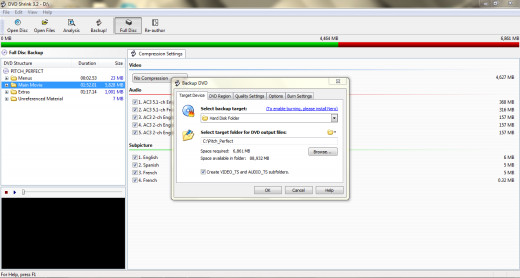
Where to Save the core files.
When you click "Backup", DVDshrink is going to alert you that the size is to big for a standard disc, click ok. Then DVDshrink will ask you where you want to store your files. I suggest storing them on the C: drive, this will enable you to do following steps much quicker then if they are located on a portable drive. You will want to name the directory after the movie. In this example I named it "Pitch_Perfect". This will make it easier for the next step to be completed and makes it a lot easier to find the folder later. Again remember to have 10 GB of space on the location where you are ripping to.
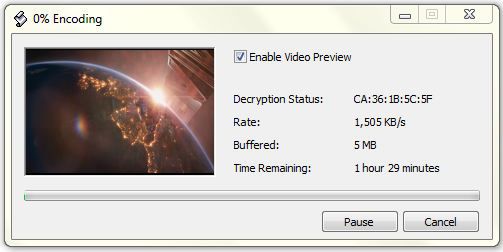
The disk will then begin ripping the files to your hard drive, which can take a while depending on the speed of the computer. This normally takes about an hour on my computer.
Finishing Up
After the files are copied to your hard drive you can then use any burning application to burn them over to DVD (if you did not change the compression setting above).
The files are saved in the same directory structure as the original disk, including special features, menus, languages, and captions.
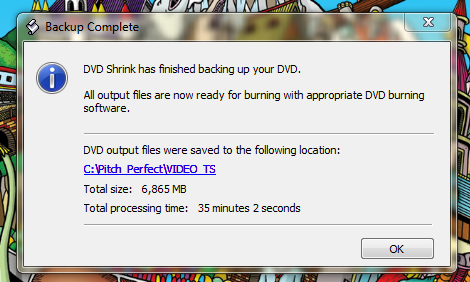
We are looking for the main movie file and will extract that in the next step.
Step 2: Using Handbrake to extract the movie files.
Google Search "Gonnateachyahow" for more of my articles.


