How to make a comic on your iPad

Have you ever wanted to create a comic or graphic novel?
If you answered yes, then you have come to the right place. If you are like me, and free time is somewhat scarce in your life, then making a comic book or graphic novel on an iPad makes a lot of sense. I can now use the time I previously wasted to do something constructive. Now I can create a comic anywhere, anytime. With just a little preparation, you will be on your way to making your first comic.

What you will need.
You will need some things.
- iPad/iPod/iPhone
- An idea
- Some pictures
- An internet connection
The Apps
- Dropbox (free account)
- Strip Design (Check App Store for current price.)

Frequently Asked Questions
- Do I have to use Strip designer?
No, you don't have to, however, I use it in this tutorial.
- Why do I have to use Dropbox? Can't I just use iTunes?
The images I use are .png files that contain transparencies. When you transfer files using iTunes, they are converted and any transparencies are removed. By using Dropbox we can bypass this and download straight into the app. It also makes it a lot easier to organise all the images into their own folders.
- Wait! I don't have any images to use. What will I do?
If you don't have pictures or an idea at the moment, don't panic! I have prepared some for you.
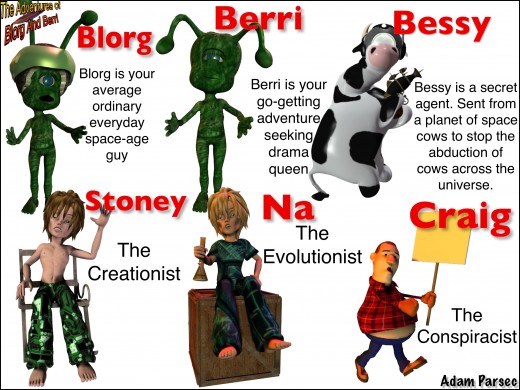
All the Characters are from my comic, The Adventures of Blorg and Berri. I give you permission to use them in your comics. All I ask is that you keep their names.
See the image below.
The Blorg and Berri cast.
Dropbox
Dropbox - Create a Dropbox account
- Dropbox - Create a Dropbox account
If you do not have a Dropbox account, you can register here for free.
Download the Blorg and Berri Comic Pack Here
Uploading Content
- Method one.
This method will get you started the quickest.
After you have downloaded the Blorg and Berri Comic Pack, you will need to unzip the file. If you require help with unzipping the file, Once unzipped, the folder will then need to be uploaded to your Dropbox account.
- Method two.
I recommend method two, as well as method one.
Click on the Request the Dropbox link above
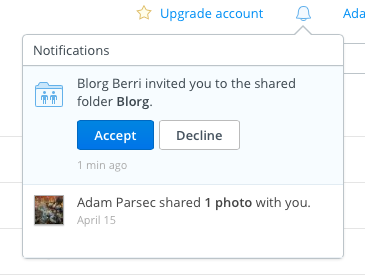
Please email me a request to share my Blorg and Berri folder on Dropbox with you. This will give you access to all the new images as I add them to the shared folder, immediately after they are uploaded. This is where I will upload any image request I get.
e.g. I want an image of Blorg with a ray gun!
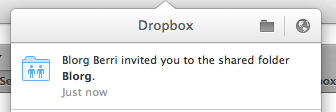
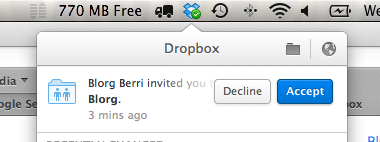
After I receive your email I will send you a link to the shared folder via Dropbox to your Dropbox account. Once completed and you have accepted the link, a folder will be added to your Dropbox account. This will not affect your storage quota.
Now we have all that out of the way, let's have some fun!
Dropbox Video
Building Your First Comic
By Adam Parsec


- Start up Strip Designer and touch Create New.
- Select the template Small then 1 and wait for it to load.
- Next, click Add photo, now we want to download from our Dropbox folder.
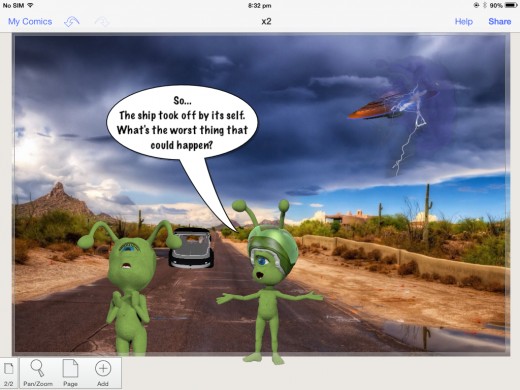
Browse to the Blorg folder we have added, then scroll to the bottom and open up the Tutorial folder. Tap the backdrop image and it will start to download.
- Now that it is downloaded, select the background and touch the padlock to the left of the comic cell to unlock it. Next, select Detach cell, and using the corners of the image, drag it out larger than the comic cell outline.
- Touch outside the image to deselect it. Now we are ready to add a UFO.
Note: You can use two fingers outside the image to resize the entire artboard to get a better look at your comic. If you have made the image too big and can not select outside the image, then simply tap the page number at the bottom left of the screen
Building Your First Comic Video
Setting the scene


This time we will be adding images using a new feature in the latest update.
- Touch the Add button down the bottom. Select Cell then Photo.
- Now select Floating cell.
- This time look for the small flower in the bottom right hand corner, see it? Good, once you touch it, a panel will slide out from the right hand side of the screen.
The quickest way to get this panel out is by sliding your finger from the right side of the screen toward the centre of your screen. Close it by swiping the panel off the screen, or use the arrow near the bottom left of the selection panel.
- Select Dropbox and scroll down to the Blorg folder, then down to the Tutorial folder. Now you will have quick access to this folder next time you open it.
- Touch the ufo.png to load it into your comic and wait for it to download.
If you touch on the background, you will notice a black frame around the UFO. We will need to remove this.
- select the UFO again, then touch the Frame icon at the bottom of the screen. Now change the Width to zero.
Now to move it into position. Select the UFO and touch the lock to the left of it to unlock. Drag the UFO to the top right of the screen. Click off it to deselect. We now have our first prop on the page.
Adding your own FX


It is time to add some FX from Blorg folder.
- Add a new floating cell to the screen, then drag it over the right side of the UFO. Next, browse Dropbox for the tutorial folder. Select FXprop_99.png. Resize it so it fits nicely. Remember to make all the cells out lines transparent.
- When you are happy with the placement, tap off the cell and then select it again. The menu will change at the bottom of the screen when you have done this. Now let's apply a Filter to make it blend with the background image better.
- Select RGB and adjust the colours to best match the clouds in the background. Now that you are happy with the blending, it is time to add another FX. In the tutorial folder on Dropbox add FXprop_50.png in the same way we added the first FX. Adjust the size until you are happy with it.
- This time we are going to move it behind the cloud FX we previously added. Simply tap off the cell, then select the cloud FX cell that is behind. To shift the cell you will have to unlock it. Tap the padlock and the menu at the bottom of the page will change. Select Order and tap the To top arrow. Now the cloud has been moved in front of the lightning.
Setting the scene + Adding your own FX Video
Adding characters
Adding characters screen shots
Click thumbnail to view full-size


- Now follow the same procedure as above and populate the comic with the Blorg and Berri characters. Find a nice place for them.
Great! Now it's time to add the speech balloon with some content.
- Touch the Add button and then Balloon. Select the desired text box. One of the great features of this app is it allows you to customise the speech balloons in many ways. Move the Balloon into position, then grab the tip of the tail to move it. Double tap the balloon to change the default text and click done.
Note: The balloon feature in this app also allows you to insert pictures instead of text. This is a great way to show a thought. Try it! Select a balloon, tap the shape icon down the bottom of the screen. Now select the Contains image option. As you can see, you can now Double click to add a photo.
Adding characters Video
Semitransparent images


This is a small trick using semitransparent images.
- Add a new cell to the page. Insert Bprops_75.png from the tutorial folder. Resize the image to fill the whole screen. Now Blorg and Berri are on a large screen.
Note: you can still edit the speech balloon. They always remain on top.
- Add another cell the choose Bessyprops_25.png. You will notice that there is not enough space to place her on the left hand side of the screen, and she is facing the wrong way to be placed on the right.
- Easy fix. Move Bessy to the bottom right side of the screen, then tap off the cell and select it again. Select the Adjust button at the bottom of the screen and select Horizontal flip. Now we have Bessy facing the correct way. Now let's add a speech balloon with some content.
Semitransparent images Video
Well done!
Now that you know the basics, it's time to step it up a bit.
Lot's of Cows


This time let's try something different.
- Add an new page with only one cell in it. Choose the same background as before. Detach the cell and stretch it out to fill the entire page.
- Zoom in on the cactus to the right of the page. Sometime, we may want to place a new object behind an object in the background image you have already made. Add a cell then add Bessyprops_3.png from the Bessy folder.
Now for some editing.
- Tap off the cell and select it again. Now touch the Draw on option on the bottom tool bar. Select the Mask option and make sure the - minus is highlighted. Simply rub out a line in the middle of our cow. Check that under the Brush option that Hard is set to 100. If the brush size is too small or big, tap Brush and adjust the size from the popup menu. When you are happy with the end result hit the save button at the top left of the screen and you will be taken back to your comic. Resize and adjust Bessy so she appears behind the cactus.
Great work! Now let's try something a bit different.
- Add a new cell with FXprop_65 from the FX folder, tap away and select it again. We are going to use the Draw on option again. This time select Mask and adjust Hard to 100, Size to 128 and Opacity to about 50. Do one even swipe over the lightning bolt to make it semitransparent and save. Now move the cell into position.
This masking options is good for making shadows of your object or characters, simply by copying and paste the cell just to the side of the original. Then applying this type of masking to the image at the back.
- Now populate the page with lots of Bessy's, making them big and small placing them in the distance and foreground. Then add a speech bubble.
When you are done, export the two comic pages you have just completed.
- Touch the Share button in the top righthand side of the screen. You will see your image rendered. Select the arrow at the top right of the screen and save to photos. Do the same with the previous comic you just made and export it to your photos as well. We are going to use them for the next project.
Lot's of Cows video
Putting it all together
Top cells
Click thumbnail to view full-size


Bottom Cell
Click thumbnail to view full-size


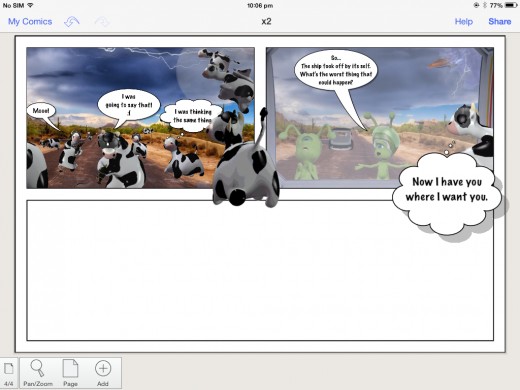


Now that we have two completed images, it's time we put them on one page. This time we will use the images we created and saved to our photo album to build the next comic page.
- Open a new page, a simple one from the menu. Select the cell with two cells at the top and one large one down the bottom.
- Click the first cell and add an image with lots of cows from your photo album. Then from the menu at the bottom of the screen touch the Add button and then Stickers.
- Select Your own then at the bottom the pop up menu push the + icon. Browse our Blorg folder on Dropbox and find a nice image of Bessy. There will be no need to edit so just save and add it to our comic.
- Move Bessy half on the cell containing cows, just to add move depth to our work. Don't panic if the Sticker looks low resolution, it will be rendered when you export the comic.
Note: You can create your own stickers from any image. simply mask out the areas you don't want and save your new image as a sticker. Stickers will always appear on top Just like the speech balloons. This is great if you use an image often, I have my signature and titles like The Adventures Of Blorg and Berri with a UFO behind it for quick access whenever I need to add it to the page.
- Next, touch the second cell and add the other image that we saved to our Photo album. Move it into position. After I adjusted mine, Bessy's speech balloon was half off the screen. To fix I simply added another speech balloon. It nicely fits overlapping the panels.
Note: If you would like the speech balloon to be inside a cell, touch the balloon and then the Shape in the bottom menu. Next touch Clips to cells and you're done.
When you are happy with your work, move on to the next cell.
- First we are going to insert Blank.png from the tutorial folder. Sometime I want a blank background, and the easiest way is to add a blank image.
- Add a picture of Blorg on one side and Berri on the other. In the space between we will add some text.
- Click Add then Effect text from the bottom menu. Select the desired effect. Double tap to edit your text, click done when finished. Without tapping off the text, tap Warp & FX from the bottom menu.
- Select an FX option from the pictures. While this popup is displayed you can grab any of the highlighted warp point.
Note: You can not close this popup if you still want to edit the shape of your text. If your text is behind the popup, simply drag your comic and position it better on the screen. When you are done, tap off your work to deselect it.
Well done! we have made our first comic strip. All that's left for you to do, is to put you name/alias on the page to take credit for your work.
Putting it all together video
Remember to add your signature
Remember to include a signature, name or alias on your page somewhere. Take credit for your work.
Show off your work here
- Post your images on Adam Parsec's Facebook Page
Show off your work. Try to make some comics of your own, I would like to see them. They don't have to be Blorg and Berri, they can be your own creation. Upload them to the Facebook site for all to see. Let's see who can make the funniest Strip?
What tutorial would you like to see next?
My comic app review
Apps you can use for building comics by layering images.
App
| My Rating
| Thoughts
|
|---|---|---|
Stip Designer
| 9.5
| Fantastic app. Always updating and adding new features. I recommend this app for beginners to advanced users.
|
Comics Head
| 7.5
| Great app. Google Drive for image storage. Has a lot of built in characters, backgrounds and props.
|
Comic Maker
| 5
| Nice app. Transparencies are not supported when importing from photo album. Dropbox feature is locked and can't be used.
|
Other app like: Comic effects v2, Comic Frames and other have been omitted from this table as they keep crashing or have many design issues making them impossible to use and rate.
Apps for comic fx and advanced cell layouts. No Layering support.
App
| My Rating
| Thoughts
|
|---|---|---|
Halftone 2
| 8
| Interesting cell formation and FX. Add speech balloons and titles. Export for use with 3D glasses and more. Offers in app purchases.
|
ComicBook!
| 7
| More cell layouts to choose from. Speech balloons and some nice built in FX.Offers in app purchases.
|
PopDots HD
| 8
| Not for making comic, however, offers some of the best comic FX I have seen, and they are fully adjustable.
|
© 2014 Adam Parsec


