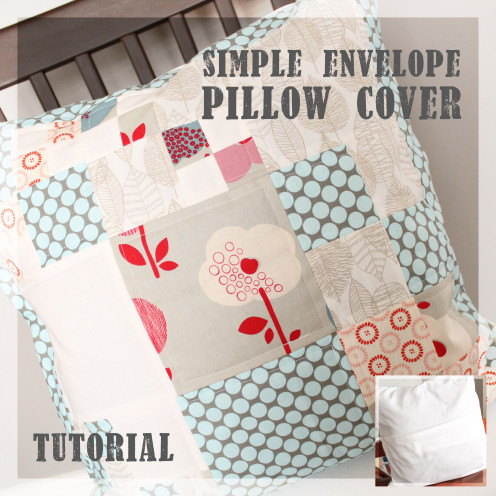
A Tutorial: A Simple Envelope Pillow Cover

Are your couch pillows looking a little outdated? Or do you want to add a bit of color to your living room? Creating an envelope pillow cover is a simple and quick sewing project a beginner sewer can complete in about an hour.
Buying new fabric can be a bit expensive. Explore your options and use an old vintage sheet, an out of date sweater, or an old blanket that has been in storage for a while.
Need a new couch pillow?
If you need a new pillow for your couch, do you sew a new one or go buy one?
Supplies:
- Fabric for the front of your pillow.
- Fabric for the back of your pillow.
- Measuring tape.
- Scissors.
- Sewing machine.

#1. Choose your fabric.
I decided to make this project a little more complicated by quilting a pillow cover, but you do not need to use a quilted top for the pillow. A single yard of any fabric will work great. Feel free to use the same fabric for the front and the back of the pillow. Or, like me, use patterned fabric for the front, and use less expensive, solid colored fabric for the backing.
#2. Measure your pillow.
Take the pillow you want to re-cover. Measure the width and the height of the pillow. Err on the liberal side because you can always make the pillow cover smaller as you go.
If you have a flexible measuring tape for measuring, great. If not, you can take a string or ribbon of sorts and run it the length of the pillow. Then use a straight ruler to measure the length of the ribbon.
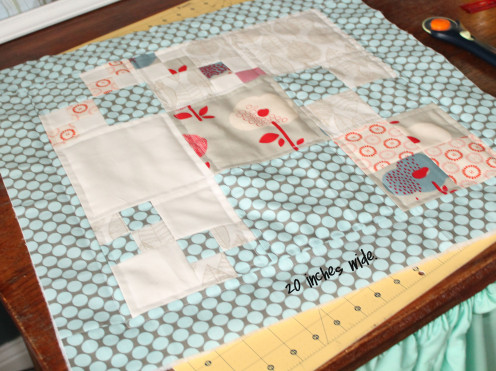
#3. Cut the fabric for the front of your pillow.
You have chosen your fabric and measured the pillow. Remember, I quilted my pillow cover but quilting the front is not necessary. Find any patterned fabric you like, and your pillow will look beautiful.
When you cut your fabric, keep in mind that when you sew the pillow cover, you will likely use a quarter of an inch seam allowance around the border. In other words, if your pillow is 15 inches tall and 15 inches wide, you need a square of fabric that is at least 15 and 1/4 inches square.
In my case, my pillow was 19 inches tall and 19 inches wide. I cut a fabric square that was 20 by 20 inches. I made sure to have plenty of room for error.
Go ahead and cut your fabric!


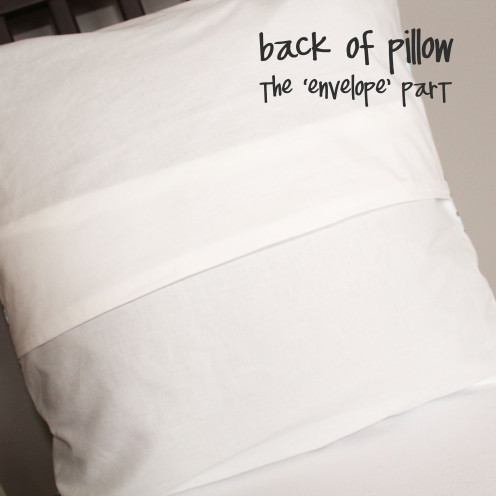
#4. Cut the fabric for the back of your pillow.
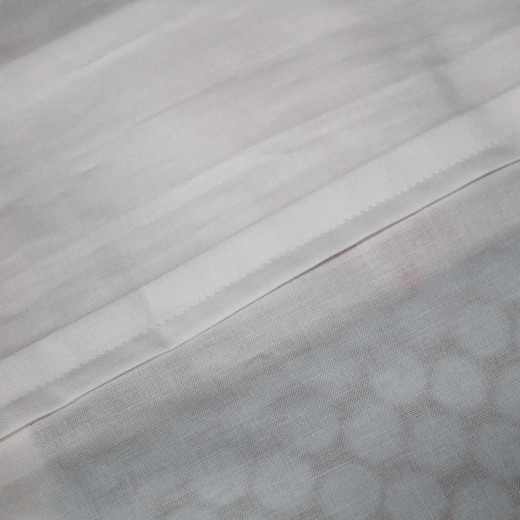
Cutting the fabric for the back of your pillow is where the 'envelope' part comes in play. Lay the fabric you cut for the front of your pillow on top of the fabric you are planning to use for the back. Instead of remeasuring, I just used the front fabric as a template for the back. One small change though. Cut a piece of fabric that is approximately two-thirds the size of the front fabric. See the referencing picture if my instructions are confusing. Cut a second piece the same size (two-thirds the size of the front fabric.)
Do not feel you need to be precise. Kind of estimate how far is two-thirds down. Cut two pieces of fabric the same size. One piece for the top half of the envelope and one piece for the bottom half of the envelope.


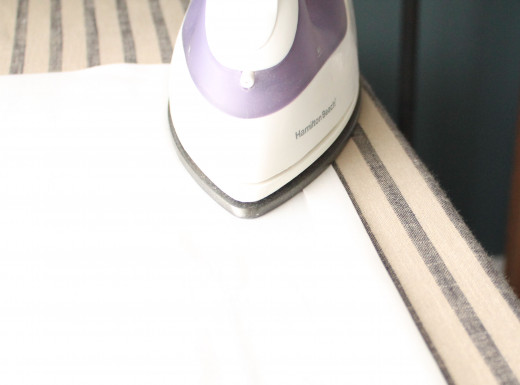
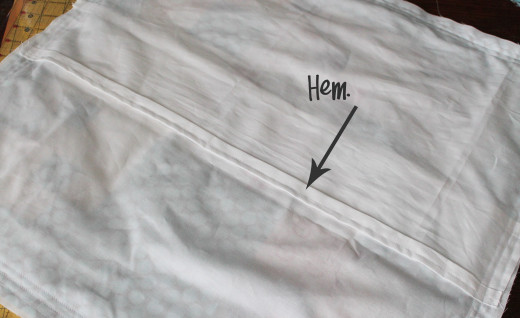
#5. Hem the fabric.
To create a finished look for the back, hem one side of each piece of fabric for the back of the pillow. Fold approximately half an inch of fabric over and iron it. At this point a raw edge of fabric still shows. Fold another half inch of fabric over and iron it again. Sew a quarter inch seam straight through the ironed portion of the fabric.

#6. Sew the front of the pillow cover to the back of the pillow cover.
Here's the fun part. You get to see your pillow cover take shape.
Lay the fabric for the front of your pillow on your sewing table. Put the patterned side of your fabric facing up. Lay the top piece of the envelope on top. Line up the sides. Put the finished hem face down. Lay the bottom piece of the envelope on top. Make sure all the pieces are lined up. You want all the right sides (patterned sides of the fabric) facing inward.
I now carefully flipped the fabric pieces over so I could use the front fabric for my sewing guide. Pin all the way around the fabric and sew a quarter inch seam allowance around the entire square.

#7. Flip your cover inside out.
Great job finishing your pillow cover! If you put the cover on your pillow and want a snugger fit, flip your cover wrong side out again and sew another quarter inch inside your original seam. As you can see in the photo above, I ended up sewing two extra seams since I had over shot my measurements quite a bit.
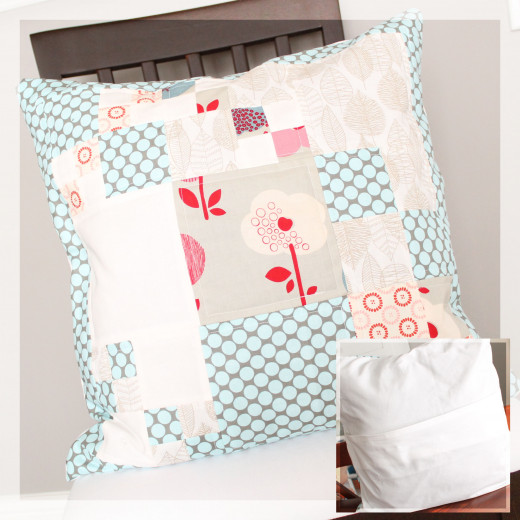
Fabric.
If anyone is curious, here are the fabrics I used for my pillow. The picture at the top of the page has corresponding letters to identify the fabrics.
A. Alexander Henry House Designer - Mecca For Moderns - Broome Street Floral in Grey
B. Amy Butler - Lotus - Slate
C. Eloise Renouf - Bark and Branch - Line Leaf in Khaki
D. Kona Cotton - White
E. An older fabric from Kate Spain's Fandango line. I highly doubt it is available anymore.
F. Organic Poppies in Shroom - Mod Basics 2 Collection from Birch Fabrics


