Kids Crafts: Stretchy Bracelets

")
To & From:
Bracelets are fantastic gifts! You can easily make them yourself to give to a child, or have your child make them to give as a gift to someone else. They are fast, fun, and super easy. You only need a few supplies and about 15 minutes to make an adorable bracelet.
This craft is recommended for ages 3 and up. Younger crafters will need supervision and assistance in completing this project.
Supplies:
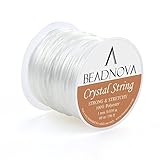
- Stretch cord (purchasable at craft stores, online, or Walmart in the craft section)
- Scissors
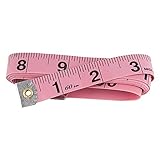
- Tape measure (the flexible kind used in sewing)
- Beads (your choice of color, size, & material)

Step 1: Measuring
A standard bracelet is typically 7 to 7 1/2 inches around. If it is possible, measure the wrist size of the person you are making the bracelet for to ensure it fits nicely. Some people have thicker wrists while others have smaller ones. Children's wrist sizes vary.
Take the measure tape and wrap it around the person's wrist in order to get your "final length".
Next, measure out that length on the stretch cord and add 2 inches. Be sure the cord is not being stretched at the time of measurement. You want it to be straight yet "loose".
If you are making a 7 inch bracelet, you will cut 9 inches of cord.
If you are making a 5 inch bracelet, you will cut a 7 inch cord.
If you are making an 8 inch bracelet, you will cut a 10 inch cord.

Step 2: Design
Looking at the beads you've selected, form a pattern which can be looped around to make a complete circle. Line your beads up on a flat surface until they measure the final length of the bracelet.

Step 3: String & Knot
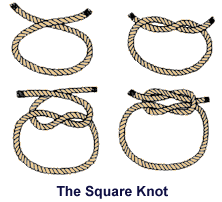
String your design onto the stretch cord. Once you have completed this you will have an inch of extra cord on each side. Take this extra cord and make a square knot, pulling it snug but not too tight. As the cord is elastic, if you pull to tightly the bracelet will bunch up.
You may choose to add a third and final tie on top of the square knot (just for good measure) if your bead holes are large enough to hide the finished size of the knot.
Alternatively some people prefer to secure the knot with jewelry glue, super glue, or craft glue. This is completely optional. A well tied square knot should be sufficient in holding the bracelet.
Finish it off:
Once completed, trim off the extra cord with a scissors. Leave a couple of millimeters so as not to upset the knot you've just completed.
Pull the knot into a bead next to it to hide the knot. You're done!
Now you (or your child) has just made your very own homemade bracelet. Wear it with pride or give it as a gift.
")


